Thursday, December 5, 2013

Grandpa's Memorial Pillows

This is a bitter sweet post for me.  My husband of 29 years died in 2009 from cancer.  Our four grandchildren were his biggest joy in life, even though the youngest was only one month old.

Other than his grand children, Arizona State University sports was his greatest passion.  While in the hospital they wanted to transfer him to intensive care because his condition was getting so bad so fast but he had something he had to do first.  Finish watching ASU baseball in the College World Series!!

Some people may think it was strange but we did his memorial with an ASU theme.  My daughter bought t-shirts for all the kids that had Arizona State Kid on the front and she had Grandpa's #1 Fan printed on the backs.  She even bought a onsie (which I can not find right now) for Camus the 1 month old.

Since the kids all outgrew their shirts my daughter wanted me to do something special with them, I decided to make pillows.  I figured that way they could they could hold onto their memories of grandpa any time they wanted.

My daughter and her family now live 12 hours away and were just here for Thanksgiving.  Since they won't be able to come back in a couple weeks we went ahead and had an early Christmas so I was able to see their expressions when they opened the pillows.  Even my 13 year old grandson Mathew had tears in his eyes and the pillows were immediately well loved :)

I think they turned out really well, what do you think?


Still have one more to make whenever I can find the missing onsie.  I know it's in my craft room somewhere :)

Have you made any special items to remember a loved one that's no longer with you?  If so I would love to hear from you.

Sunday, November 17, 2013

Tie Dyed Filing Cabinet


I am so excited with how my filing cabinet turned out.  I didn't take a before picture but everyone knows what a plain black filing cabinet looks like.  I have a monster 4 drawer lateral filing cabinet in my craft room right now and it's just way too big so I decided to change it for a smaller one.


This cabinet has been outback in my work area and had several colors on it because it had just been a spot to spray paint on.  All those colors gave me an idea to try and make it look tie dyed.

All I did was take 3 colors of spray paint, teal, purple and a metallic blue and had fun.  I didn't even bother to sand off the other colors.  I also did this same technique on our poker table and chairs but they are black and brown so not completely over the top.

My husband is not a fan because he keeps saying the 60's are over, never! :)  The colors are really not this bright in real life it's pretty subtle but the flash made it more crazy than it is.

  I figure the craft room is my area so if I want crazy colors I should go for it.  Please let me know if you have the nerve to go wild in some of your decorating projects.

Monday, November 4, 2013

Casino Room


It's been a long long process and finally our new Li'l Redneck Casino is ready to be revealed.
What a project this was but oh so worth it.
This room was originally just an ugly storage room in a back room of our house.  First we had a friend redo that room into my office which was great, but around my house it seems to take a couple try's to determine what a room is really going to be.  We had our 777 Reel Machine on the back patio but when my husband decided he had to spend the "big bucks" to get a video poker machine I put my foot down and said it could not sit outside.  So guess it was my fault I had to move my office.


There were so many small projects that went into this room.  I am going to give you an overview of them here then will be posting individual blogs about many of them.

The first step was to agree on what color to do the room, it took a little persuasion and sneakiness but I got my way :)
I wanted gold and black but my husband wasn't quite as excited about that as I was.  He should know better than to send me to Home Depot without him when I have a plan that's he's not on board with.  But we needed something for another project so off I went.  Of course I had to stop in the paint department (just to get some color ideas) and wouldn't you know they had the most beautiful gold paint I have ever seen.  It was Martha Steward gold metallic and $50 a gallon!!  I am usually very frugal and mostly buy their marked down oops paint but once I saw this I had to have it.  Couldn't wait to get home and show him, and as expected he wasn't as excited as I was but agreed since I had already bought it I could go ahead.  Love it when I get my way!!!


There is a sliding glass door that leads into the casino from the back patio so we decided to use my Cricut machine and cut vinyl letters with the name Li'l Redneck Casino.   They had to be cut backward and put on from the inside so it was a little challenging for me but we got it done.  There's one more addition to make, were going to add in smaller letter "AKA June's Town" for a very close friend of ours who uses this as her hideaway.


Once we started on the gold paint my husband agree to using black as the accent.  So the wall behind the machines, the ceiling, the trim and the door are all a glossy black.  To make this wall pop I again used the Cricut machine and cut out large stencils for "Casino".  We cut these out of thin wood using my scroll saw then painted them red and put on a coat of glue and glitter.  Even with the lights out the glitter still shows up great.  My husband cut 1" dowel rods and glued them to the back so they stand out from the wall just a little for some 3D effect.


We were given a folding poker table and chairs by June.  They really needed a little tlc and I'm pleased how they turned out.  I will be doing another blog on just how we did this.  There are 3 more chairs that we are finishing up now.  Six chairs will make for the perfect size poker group.


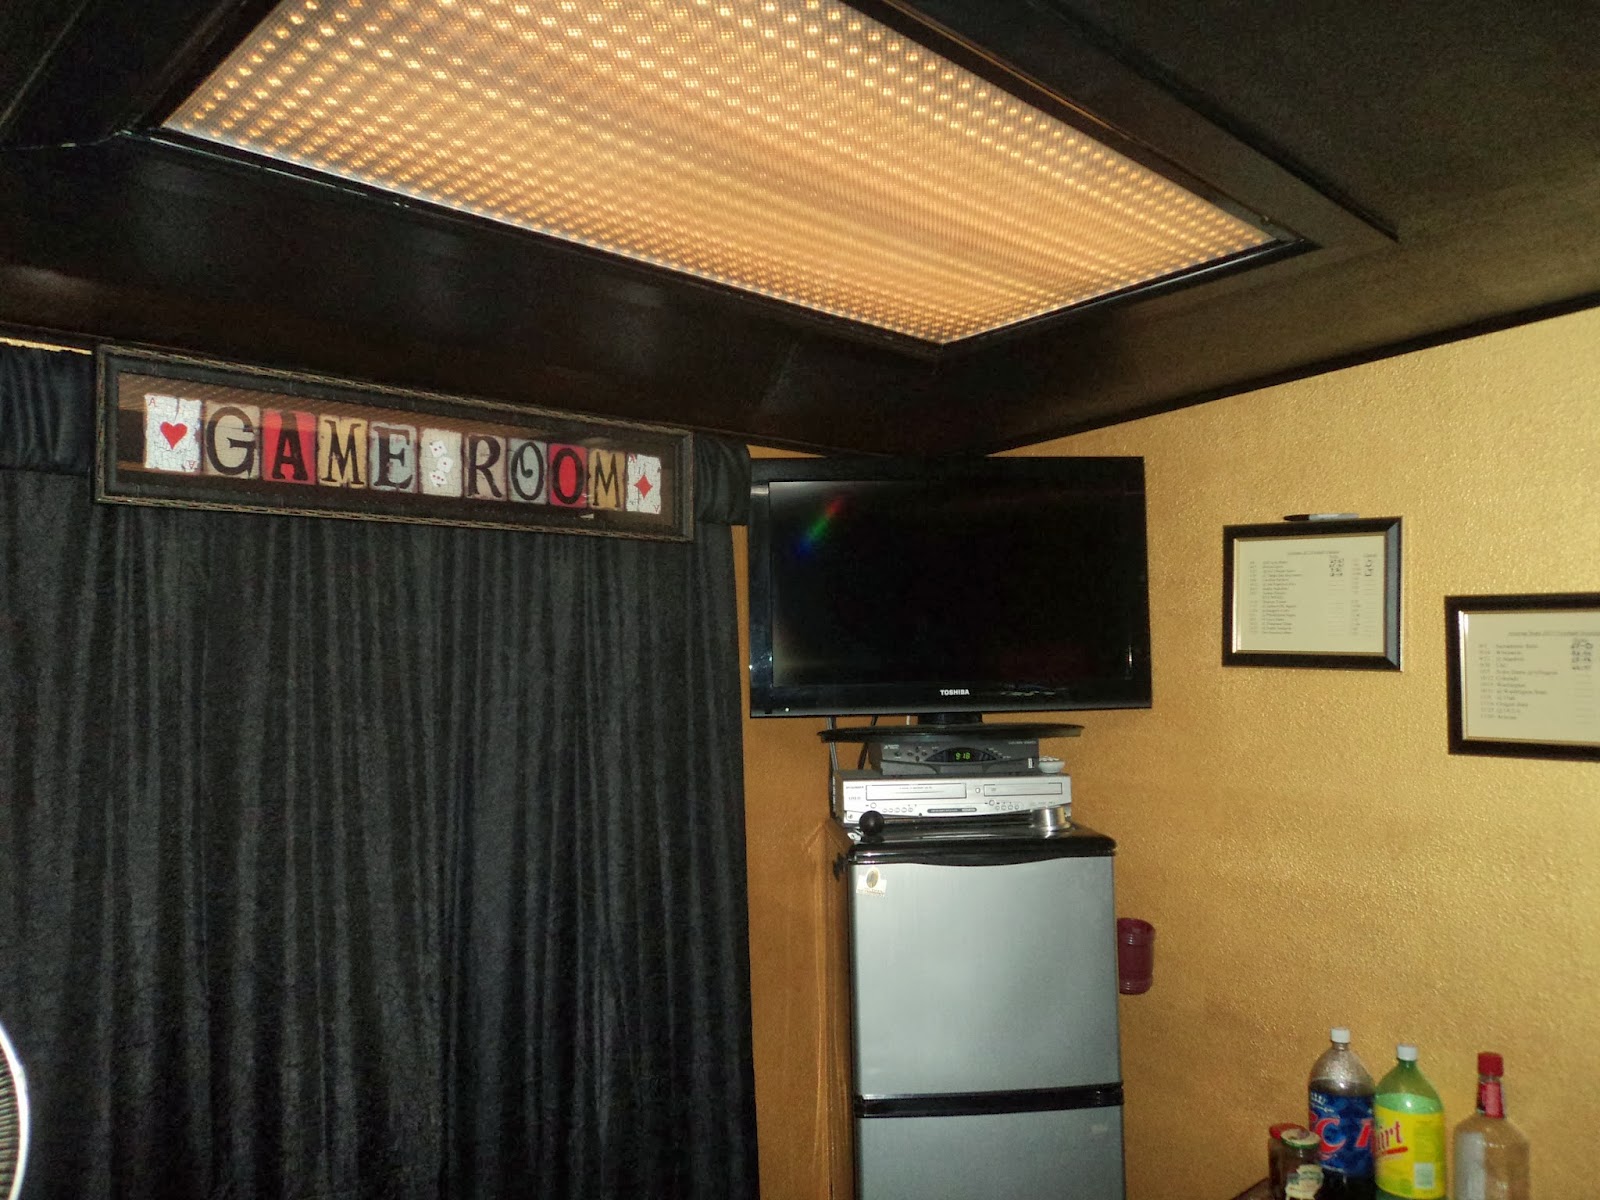
For my birthday another friend Dianne gave me this Game Room sign.  I knew I wanted to do something besides just hang it on the wall so I made a cornice for the window with the sign as the focal point.  She was so happy with how it turned out and so was I.


These two lights were glass plates for slot machines that we turned into lighted additions.  The pictures definitely do not do them justice, they are gorgeous.  


I am a HUGE ASU Sun Devil and Arizona Cardinals football fan so I printed their schedule for the year and put each in a frame with glass.  I left a place to fill in the scores along with a win/loss column and just use a Sharpie marker to fill in the blanks on the outside of the glass.  Hopefully I end up with a lot more W's than L's at the end of the season.


This picture is of a large neon light that I used Gallery Glass to paint.  I shared this on the Funky Junk Facebook page and had many positive replies so I am eventually going to do another blog on how to use that paint, which if you've never tried is really simple.


My husband was very adamant about wanting the right atmosphere so he didn't want the overhead lights too bright.  Another friend Paul suggested painting peg board black and inserting inside the frame.  Turned out great now it looks sort of like stars twinkling at night.  What would we have done without our friends for this redo? The refrigerator in the corner will be made to look like a slot machine some time down the road. 


Another little touch we added was to make wood dice as the finials for the curtain on the large glass door. We found two wood blocks and painted them like dice.  My husband just drilled holes in the sides and glued them on the conduit pipe we used for the curtain rods.  In case you don't know conduit is a metal pipe used in construction and extremely inexpensive.  It comes in 10' lengths and can be cut however long you need it and painted to match your decor.


Since our friends are such an important part of our life we started a Winners Wall.  Another friend Bud got us a couple pieces of metal that we painted black so it they would blend in and attached to the wall.  Each time someone hits the big one they get their picture taken and I use my Xyron machine to put them on magnets.  If you look closely you can see 3 of our grandchildren have made the wall too :)

We still have a few more additions to make but for now it's time to sit back, relax and throw some money in the machine.  Please take a minute to give us your feedback on this room and I'd love to hear about anything you may have tackled like this.  Wish me luck at the machine!!!


I had to share what this room originally looked like.  I don't know what the people were thinking that painted this room purple with ugly dropped ceilings.


Here is what it looked like when it was my office, we had already moved almost everything before I remembered to take a picture.  Much better than the purple thanks to another friend Jeff who completely tore down the walls and ceiling and remodeled for us.


Tuesday, October 15, 2013

1950 Porcelain Kitchen Island/Table

I am so excited about this new table I picked up over the weekend.  It is from 1950 and the top looks like the original porcelain in red and white.


The bottom portion was pretty rusty so I took it apart and sanded it down then repainted with white and a couple coats of triple thick glaze.


I love the dived drawer in the front.

It is 40" long x 25" deep and 30" tall.


When we took it apart we found the original Aug 50 date on the bottom.

There are so many ways this piece could be used.  With the porcelain top this would be perfect for any cake decorator,  great in the garage as a work table or in a craft room.  

This is available in Phoenix Arizona for local pick up or could be shipped if we took it back apart.  Only asking $100 for this great item.  

Monday, October 14, 2013

Antique Wood Hat Stands

When I first brought home a box of wood items from an auction my husband tried to throw these away!  I was not positive what they were but knew they were just too interesting to throw away.  And after doing a little research (I love when I can say this to my husband) I was right and found out they were antique hat stands.


The one was broken but it was an easy fix with a little glue and new screw.  After the glue dried all it took was a little sanding and we were ready to go.  This was my first attempt at making my own chalk paint which I have to admit turned out great.  I think we were off to a good start.


For the painting I tried a new technique I had seen online to use Vaseline on spots that you wanted to look distressed.  This was a complete guessing game on what it would look like since I couldn't really see where the Vaseline was going or how much I was putting on.


It was a very simple thing to do and I love the results so I guess I did it right.  After I finished sanding, but before, painting I put a little Vaseline on my finger and just dabbed in the places I wanted to look distressed.  As I said I just guessed a little here and a little there, but I did remember something about a little goes a long way.  I painted as usual and once the paint was dry I took very fine sand paper and rubbed over the piece.  The paint only came off in the areas I put the Vaseline and gave me the exact look I was hoping for for I guess it was another success.  If you want these areas to be a different color than the original wood you can add another coat of paint prior to the Vaseline.


Another first for me was printing on tissue paper.  I found this beautiful graphic on Graphic Fairy and thought it worked perfect on the antique hat stands.


I had seen something about taping tissue paper to regular copy paper and run it through the printer.  Sounded easy enough, but after a few unsuccessful tries I realized I needed to tape ALL the edges to keep the tissue flat.  Once I did that it worked great.

After they were printed I trimmed the tissue as close to the graphic as I could then just decoupaged to each hat stand.

I was pretty pleased with the final result let me know what you think.  Have you tried printing on the tissue paper and if so what worked best for you?

Monday, September 30, 2013

Pink Wood Desk

Talk about an ugly desk that should have been destined for the dump.
But it is so well made and  has great storage I just couldn't do it.


    This one took some major sanding.  I don't know what they had used to keep the old handles on or what they had drawn flowers with but it sure did not want to come off.  But with some good old persistence and lots of sand paper I finally won the war.  


I decided to step out of my comfort zone with the paint on this one.  I had never done a bright pink piece of furniture before but am so glad that I did. 


To compliment the pink I decided to paint the insides and the drawer knobs dark brown.  I also made sure and painted the sides and interior of the drawers to match.


Once the top was sanded smooth there was a beautiful grain so I just stained it dark walnut (I think that's what color it was) to pull it all together.


And for the finishing touch I stenciled fleur de lis on the cabinets.


If I do say so myself I think this turned out extremely well.

This desk is for sale for only $175. and I believe it should be able to ship Greyhound.  I have not shipped a large item before but from what I have checked into should be not problem.  If you are interested please contact me and I'll get a quote for you.

Friday, September 27, 2013

Baby Changing Table redo


Here is a picture of a very boring changing table I picked up at a local auction.  I couldn't decide what I wanted to do with it I had many ideas like a potting table or bar. But my adopted grand daughter had other plans, she decided to have a baby.


This was really a simple redo just took quite a bit of time because of all the different pieces.  It originally had a varnish on most of it which had to be sanded off.  Again more of a process than I expected.

I wanted to paint it to match the crib set so I picked a light blue, navy blue and dark brown.


For an added touch I took dark blue scrap booking letters and decoupaged them on the back. 


There was no pad on the table so I decided to make one instead of buying it.  I purchased 1" foam and a waterproof material to make the pad.  I then wanted a removable cover so it could easily be washed.  I sewed the cover just like a pillow case and added 3 Velcro pieces to keep it closed.

She had no idea I was doing this for her and was so excited when I showed up unannounced.  Just took her a couple hours to have it filled with diapers and clothes.  I think it was a good choice.